Manual Transmission Repair: A Comprehensive Guide (Updated 04/28/2026)
Delve into the intricacies of manual transmissions! This guide offers detailed insights, covering fluid differences, enthusiast perspectives, and the transmission’s complex mechanical nature.
Manual transmissions, a cornerstone of automotive engineering, offer drivers direct control over gear selection and engine RPM. Unlike automatic systems, they rely on a driver-operated clutch and a precise shifting mechanism to transfer power from the engine to the wheels. This direct connection provides a more engaging driving experience, often favored by enthusiasts for its responsiveness and control.
Though increasingly less common in modern vehicles, understanding manual transmissions remains crucial for both drivers and mechanics. They represent a significant piece of automotive history and continue to be found in many performance and economy cars. Proper maintenance and repair knowledge are essential for keeping these systems functioning optimally, ensuring reliable performance and extending the lifespan of the vehicle. The transmission, second only to the engine in complexity, demands careful attention.
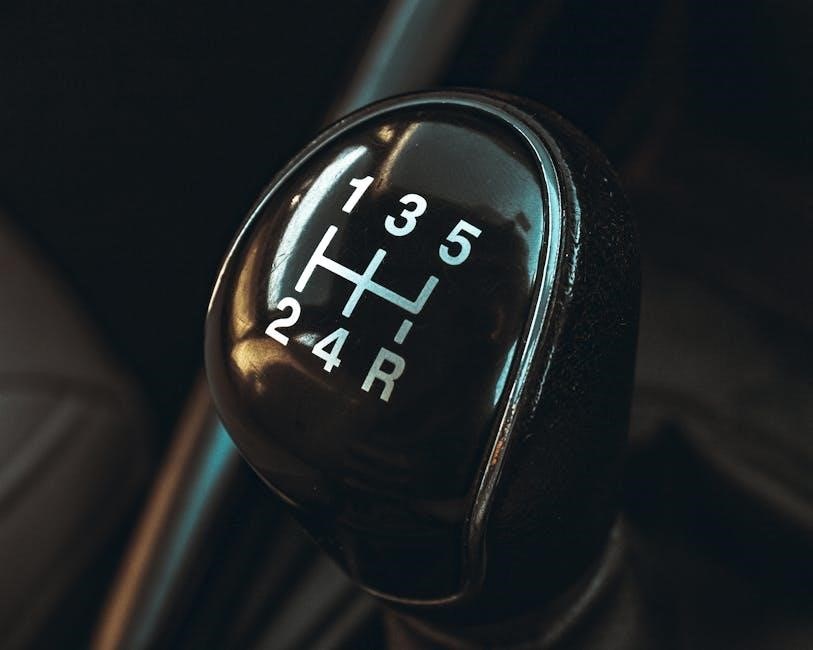
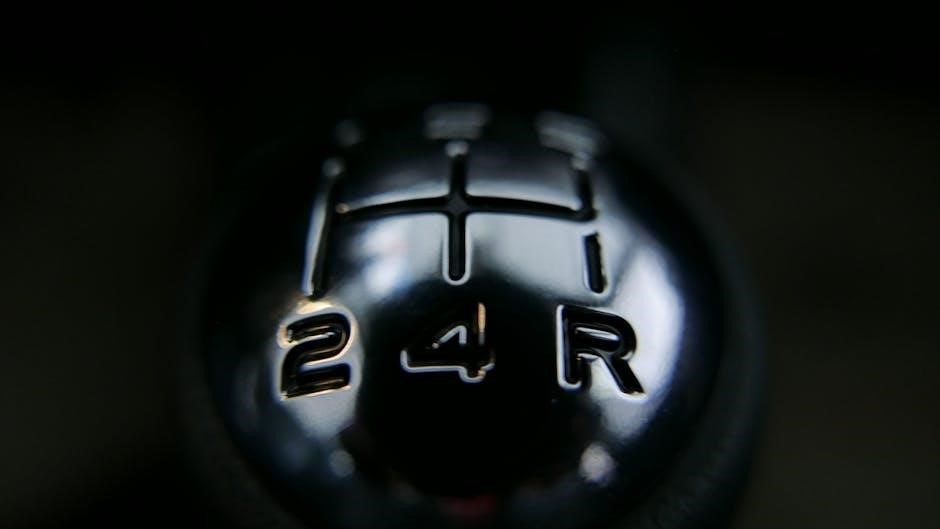
Understanding the Components
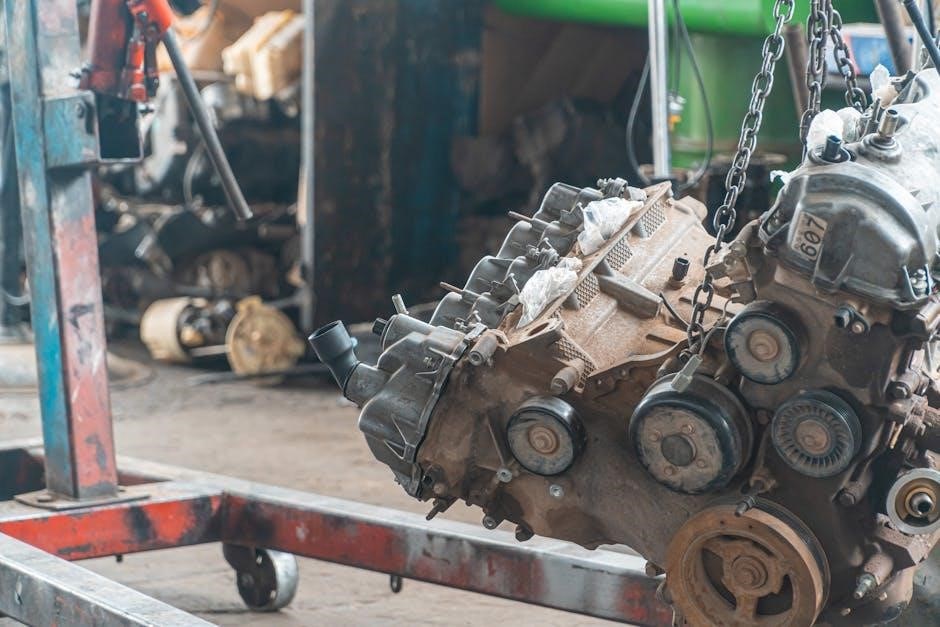
A manual transmission is a complex system comprised of several key components working in harmony. The clutch disengages and re-engages power from the engine, allowing for smooth gear changes. Gears themselves, arranged in various ratios, determine the vehicle’s speed and torque. Synchronizers are vital for matching the speeds of gears before engagement, preventing grinding.
The shifter mechanism, controlled by the driver, selects the desired gear. Bearings reduce friction and support rotating parts. Finally, transmission fluid lubricates these components, minimizing wear and dissipating heat. Understanding how each part interacts is fundamental to effective diagnosis and repair. The intricate detail rivals even that of the engine itself, demanding a methodical approach to service.
Common Manual Transmission Problems
Expect issues like grinding gears, clutch malfunctions (slipping or failure), imprecise shifting, and unusual noises – all common indicators needing prompt attention and repair.
Grinding Gears: Causes and Solutions
Gear grinding is a frustrating symptom often signaling synchronization issues within the transmission. Worn synchronizers, responsible for matching gear speeds, are a primary culprit. This mismatch creates friction, resulting in that unpleasant grinding noise, particularly during shifts.
Low or contaminated transmission fluid can exacerbate the problem, reducing lubrication and hindering synchronizer function. Incorrect clutch adjustment, or a failing clutch, can also contribute, preventing complete disengagement and causing gear clash.
Solutions involve inspecting and potentially replacing worn synchronizers. A transmission fluid change with the correct fluid type is crucial. Adjusting or replacing the clutch assembly may also be necessary to ensure smooth gear engagement and eliminate grinding.
Clutch Issues: Slipping, Sticking, and Failure
Clutch problems manifest in several ways, impacting drivability. Slipping occurs when the clutch disc doesn’t fully engage, causing engine RPM to rise without proportional speed increase – often due to wear or oil contamination. Sticking prevents smooth gear changes, making shifting difficult and jerky, potentially caused by a warped pressure plate or a dry clutch fork.
Complete clutch failure leaves you unable to engage a gear. Common causes include a broken pressure plate, worn clutch disc, or a faulty throw-out bearing. Regular inspection and maintenance are vital.
Solutions range from clutch adjustment to full replacement of the clutch kit (disc, pressure plate, and throw-out bearing). Addressing leaks and ensuring proper hydraulic system function are also essential.
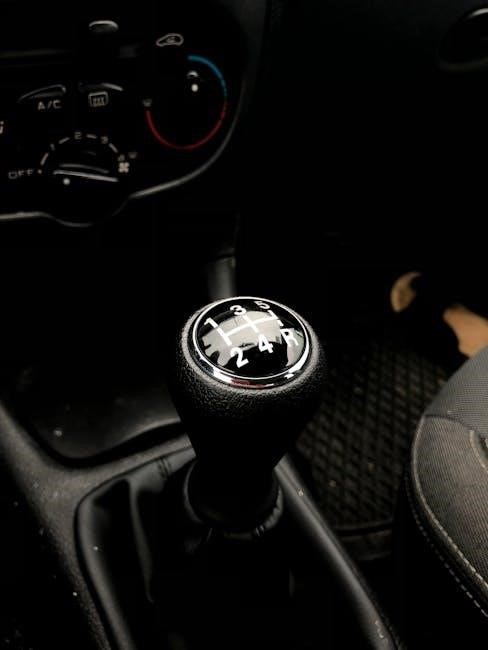
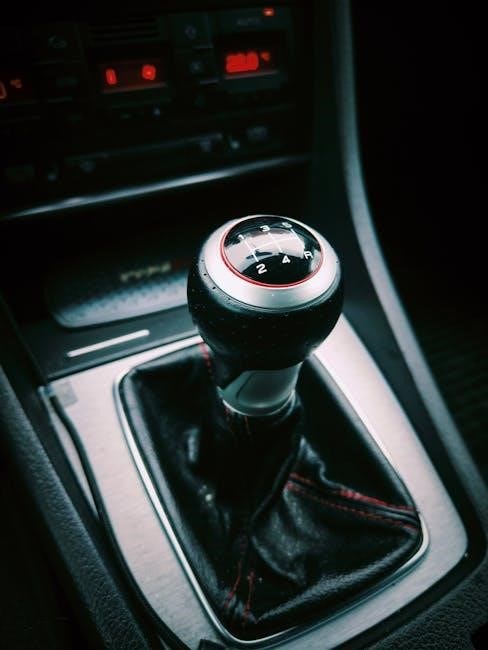
Shifter Problems: Sloppy or Difficult Shifting
Shifter issues significantly detract from the driving experience. Sloppy shifting, characterized by excessive play or vagueness, often stems from worn shifter bushings, linkage components, or internal transmission wear. This imprecision makes selecting the correct gear challenging.
Difficult shifting, conversely, involves excessive force needed to move the shifter, potentially indicating a damaged synchronizer, bent shift fork, or internal obstructions. Grinding noises often accompany this issue.
Diagnosis involves inspecting the shifter linkage for wear and play, and checking internal transmission components. Repair may include bushing replacement, linkage adjustment, or, in severe cases, transmission disassembly and component replacement.
Noise from the Transmission
Unusual noises emanating from the manual transmission are strong indicators of underlying problems. Whining sounds often suggest worn bearings, while clunking noises can point to excessive gear backlash or damaged synchronizers. Grinding sounds, particularly during shifts, frequently indicate synchronizer failure.
Diagnosis requires careful auditory assessment to pinpoint the noise’s origin and characteristics. This often involves differentiating between noises occurring during engagement, disengagement, or neutral.
Repair strategies depend on the noise’s source. Bearing replacement, synchronizer repair, or gear adjustments may be necessary. Ignoring transmission noises can lead to catastrophic failure, necessitating a complete rebuild.
Diagnostic Procedures
Effective diagnosis begins with thorough inspection, fluid checks, and potentially, internal disassembly to assess component condition and pinpoint the root cause of issues.
External Inspection for Leaks and Damage
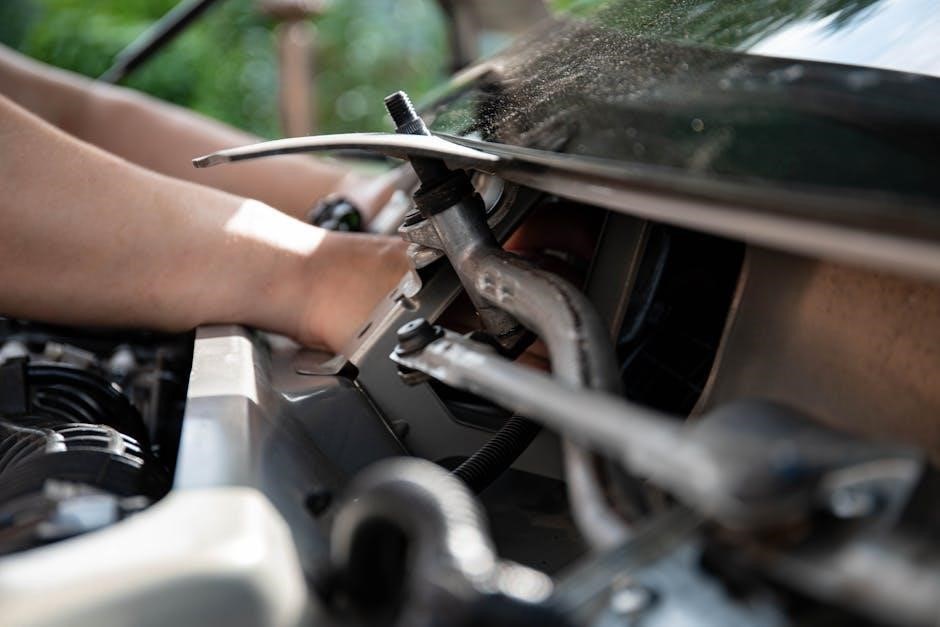
Begin with a comprehensive visual assessment. Carefully examine the transmission casing for any signs of fluid leaks – look for drips or wet spots around the seals, gaskets, and the fill/drain plugs. Pay close attention to the areas where the driveshaft connects and around the shifter linkage.
Inspect the transmission’s exterior for physical damage, such as cracks, dents, or corrosion. Check the condition of the mounting brackets and ensure they are securely fastened to the vehicle’s frame. A damaged bracket can cause excessive vibration and stress on the transmission.
Also, scrutinize the shift linkage for wear or looseness, as this can contribute to imprecise shifting. Don’t forget to check the condition of the boots protecting the CV joints (if applicable) for tears or damage, as these can allow contaminants to enter and cause premature failure.
Checking Transmission Fluid Level and Condition
Assessing the fluid is crucial for diagnosis. Locate the transmission fill plug (consult your vehicle’s service manual for its exact location). With the engine warm, carefully remove the plug. The fluid level should be at or near the bottom of the fill hole.
Next, examine the fluid’s condition. Healthy transmission fluid is typically a clear amber color. Dark, cloudy, or burnt-smelling fluid indicates contamination or degradation, suggesting internal wear or overheating.
Feel the fluid between your fingers – it should be smooth, not gritty. Metal shavings indicate significant internal damage. Remember, unlike engine oil, checking manual transmission fluid isn’t always straightforward, and some transmissions don’t have a dipstick.
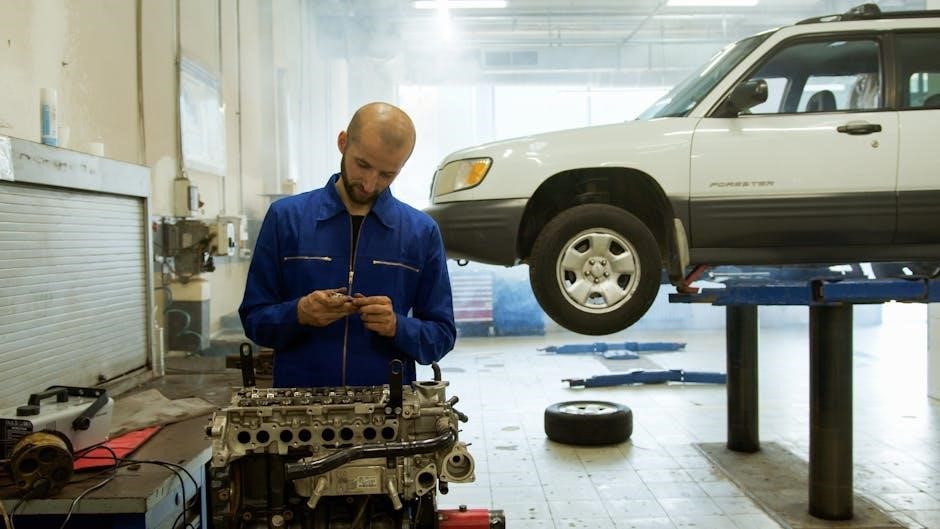
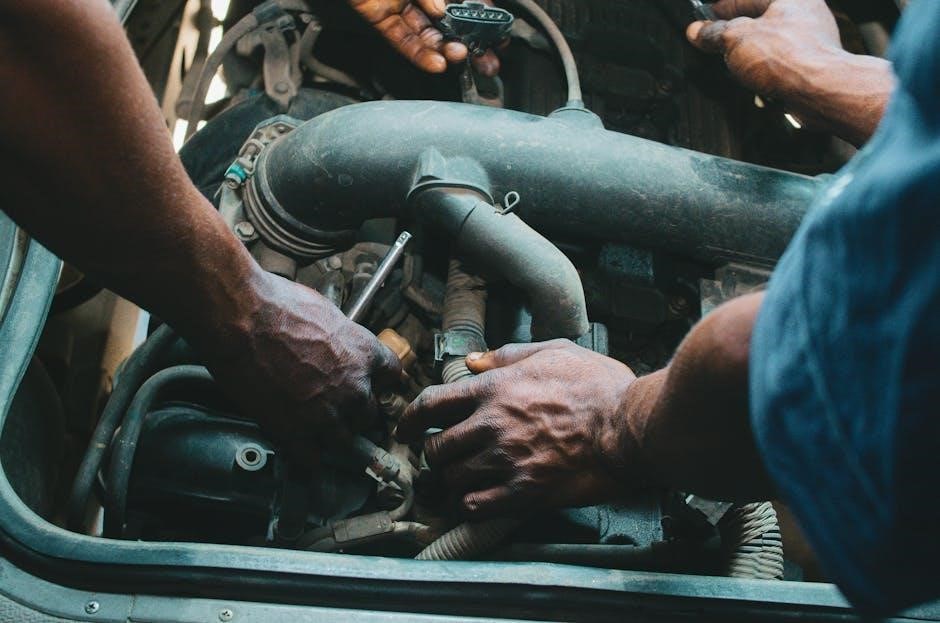
Internal Inspection: Disassembly and Assessment
Complete disassembly requires meticulous organization. Begin by carefully removing the transmission case, noting the position of all components. Inspect gears for chipped, cracked, or worn teeth. Examine synchronizers for wear patterns and damage – these are key to smooth shifting.
Bearings should rotate smoothly without play or grinding. Look for discoloration or pitting on bearing surfaces. Check the shift forks for bending or wear. Inspect the differential for proper engagement and worn components.
Document everything with photos! This aids reassembly. Any signs of metal debris are critical indicators of internal failure. A thorough assessment reveals the root cause of transmission issues.
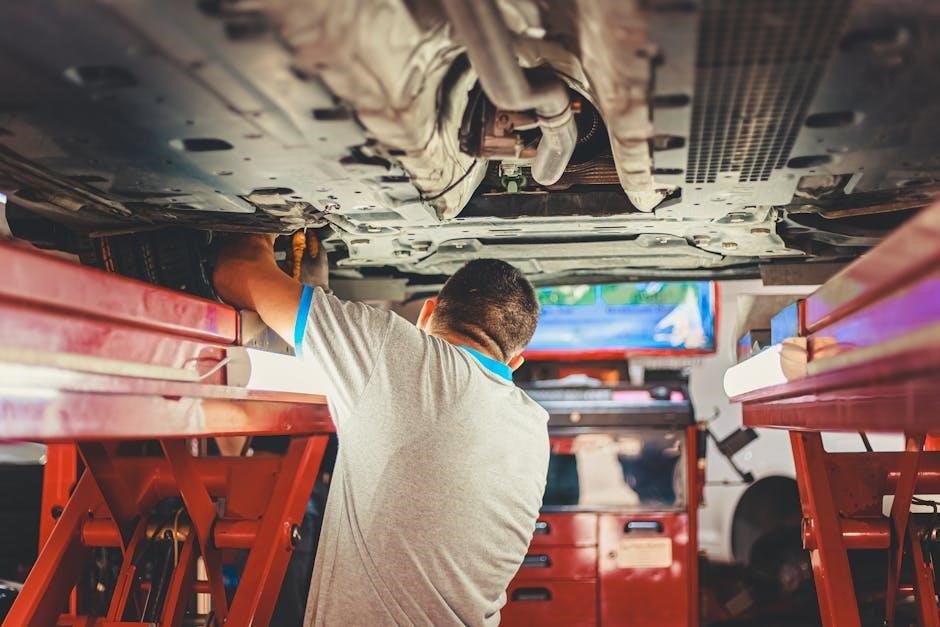
Repair Procedures
Precise execution is vital for successful repairs. This section details clutch, synchronizer, bearing, and gear replacements, ensuring optimal transmission function and longevity.
Clutch Replacement: Step-by-Step Guide
Preparation is key: Disconnect the battery and safely raise the vehicle, supporting it with jack stands. Drain the transmission fluid before beginning disassembly. Remove the shifter linkage, driveshaft, and exhaust components obstructing access.
Disassembly: Carefully detach the transmission from the engine, noting wiring and cable connections. Support the transmission securely. Remove the pressure plate, clutch disc, and throw-out bearing. Inspect the flywheel for wear or damage; resurface or replace as needed.
Installation: Align the clutch disc with the pilot bearing and install it onto the flywheel. Mount the pressure plate, ensuring proper orientation, and tighten bolts gradually in a star pattern. Reinstall the throw-out bearing and transmission, reconnecting all components in reverse order. Finally, refill the transmission with the correct fluid.
Synchronizer Replacement
Accessing the synchronizers requires transmission disassembly. After draining the fluid and removing the top cover, carefully extract the shift forks and sliding sleeves. Inspect each synchronizer for wear, scoring, or broken components – often the cause of grinding gears.
Removal and Installation: Use a specialized synchronizer removal tool to avoid damage. Clean the synchronizer hub and keyways thoroughly. Install the new synchronizer, ensuring proper orientation of the blocking rings and springs. Apply a small amount of transmission assembly lubricant to the components.
Reassembly is critical: Carefully reinstall the shift forks, sliding sleeves, and top cover, verifying proper engagement. Double-check all components before refilling the transmission with the specified fluid. A properly replaced synchronizer restores smooth, quiet shifting.
Bearing Replacement
Identifying failing bearings often presents as noise. During transmission disassembly, carefully inspect all bearings – input shaft, output shaft, and countershaft – for play, roughness, or discoloration. A worn bearing can cause significant damage if left unaddressed.
Removal requires precision: Utilize a bearing puller to safely remove the old bearing without damaging the surrounding components. Clean the bearing bore thoroughly before installing the new bearing. Apply transmission assembly lubricant to the new bearing before installation.
Proper installation is key: Gently press the new bearing into place using a bearing press or socket. Ensure the bearing is seated squarely and rotates freely. Reassembly should follow the manufacturer’s specifications for torque and alignment.
Gear Replacement
Damaged gears necessitate replacement for proper transmission function. Inspect gear teeth for chipping, cracking, or excessive wear during disassembly. Replacing gears often requires careful consideration of gear sets to maintain proper ratios and compatibility.
Removal and installation demand precision: Use a gear puller to remove the damaged gear from the shaft, avoiding damage to the shaft itself. Clean the splines thoroughly before installing the new gear. Apply assembly lubricant to the splines to facilitate installation.
Verify proper meshing: Ensure the new gear meshes correctly with its mating gear. Check for smooth rotation and proper alignment before reassembling the transmission. Torque all fasteners to the manufacturer’s specifications.
Transmission Fluid: Types and Maintenance
Selecting the correct fluid is crucial! Regular fluid changes are vital, though less frequent than oil changes, ensuring optimal manual transmission performance and longevity.
Choosing the Right Transmission Fluid
Selecting the appropriate transmission fluid is paramount for optimal performance and longevity. Modern manual transmissions often require specific fluid types – differing significantly from older designs. Ignoring manufacturer recommendations can lead to premature wear, shifting difficulties, and even complete transmission failure.
Generally, fluids fall into categories like GL-4 and GL-5 gear oils, with synthetic options offering superior protection and temperature resistance. However, always consult your vehicle’s owner’s manual or a trusted repair database to determine the exact specification.
Using the wrong viscosity or a fluid incompatible with the transmission’s materials (like brass or aluminum) can cause corrosion and damage synchronizers. Prioritize quality and compatibility over cost; a proper fluid change is a relatively inexpensive preventative measure compared to a full transmission rebuild.
Transmission Fluid Change Procedure
Regular transmission fluid changes are crucial for maintaining a healthy manual gearbox. Begin by warming up the transmission slightly for better flow. Locate the drain and fill plugs – typically on the transmission case’s side or bottom. Carefully remove the drain plug, allowing the old fluid to completely drain into a suitable container.
Inspect the drained fluid for metal shavings, a sign of internal wear. Replace the drain plug with a new crush washer. Next, using a pump or bottle, fill the transmission with the correct fluid type until it reaches the fill plug opening.
Reinstall the fill plug, ensuring it’s tightened to the specified torque. Finally, verify the fluid level and check for leaks. Dispose of the old fluid responsibly.
Importance of Regular Fluid Changes
Maintaining optimal transmission fluid condition is paramount for longevity and performance. Though not as frequent as oil changes, neglecting this service leads to significant issues. Clean fluid lubricates gears, synchronizers, and bearings, reducing friction and wear. It also helps dissipate heat generated during operation, preventing overheating and damage.
Over time, fluid degrades, losing its lubricating properties and accumulating contaminants like metal particles and clutch material. This accelerates wear, causing grinding, difficulty shifting, and ultimately, transmission failure.
Regular fluid changes, adhering to the manufacturer’s recommendations, proactively prevent these problems, ensuring smooth operation and extending the transmission’s lifespan, saving costly repairs.
Tools and Equipment Needed
Successful manual transmission repair demands a well-equipped workspace. Essential tools range from standard hand tools to specialized equipment, prioritizing safety throughout the process.
Essential Hand Tools
A solid foundation of hand tools is crucial for any manual transmission repair endeavor. This begins with a comprehensive socket set, including both metric and standard sizes, alongside various wrenches – open-end, box-end, and adjustable. Having a torque wrench is non-negotiable, ensuring proper fastener tightening to prevent damage or failure.
Screwdrivers (Phillips and flathead) in multiple sizes are essential, as are pliers – needle-nose, slip-joint, and locking pliers. A hammer (ball-peen is versatile) and a punch set will prove invaluable for dislodging stuck components. Don’t forget a good set of hex keys (Allen wrenches) and a breaker bar for stubborn bolts. Finally, a magnetic pickup tool will save countless frustrating moments retrieving dropped parts!
Specialized Transmission Tools
Beyond standard hand tools, manual transmission work demands specific equipment. A transmission jack is paramount for safely supporting and lowering the heavy unit. Internal work necessitates a set of snap ring pliers, both internal and external, for removing retaining rings. Gear pullers, in various sizes, are vital for separating gears and components.
Synchronizer tools, designed for specific transmission types, are essential for proper installation. A valve body removal tool simplifies access to internal parts. Bearing presses are needed for installing and removing bearings without damage. Finally, a dial indicator with a magnetic base aids in checking runout and alignment. Investing in these tools ensures efficient and accurate repairs.
Safety Precautions
Manual transmission repair involves heavy components and potential hazards. Always disconnect the battery to prevent accidental electrical shocks. Support the vehicle securely with jack stands – never rely solely on a jack. Wear safety glasses to protect your eyes from flying debris and metal shavings.
Gloves are crucial to shield your hands from sharp edges and fluids. Be mindful of hot exhaust components during work. When handling the transmission, use a transmission jack and enlist assistance; it’s incredibly heavy! Properly dispose of used fluids according to local regulations. Prioritize a clean, well-ventilated workspace to minimize risks.
Advanced Repair Techniques
Master complex repairs! This section explores case splitting, differential work, and troubleshooting intricate transmission issues for seasoned mechanics and enthusiasts.
Case Splitting and Rebuilding
Case splitting represents a significant undertaking in manual transmission repair, demanding meticulous attention to detail and a comprehensive understanding of the gearbox’s internal architecture. This process involves carefully separating the transmission case halves, often requiring specialized tools to overcome tight fits and sealant adhesion.
Prior to separation, thorough cleaning is crucial to prevent contamination during reassembly. Once split, a complete inspection of all internal components – gears, shafts, bearings, synchronizers, and seals – is essential to identify wear or damage. Rebuilding necessitates replacing worn parts with high-quality replacements, applying appropriate lubricants, and precisely torquing fasteners to factory specifications.
Proper alignment and gasket installation are paramount to ensure a leak-free and reliable reassembly. This advanced technique restores the transmission to optimal functionality, addressing issues beyond simple component replacement.
Differential Repair
The differential, an integral part of many manual transmission setups, requires specialized attention when addressing issues. Its primary function is to allow the wheels to rotate at different speeds during turns, preventing binding. Repair often involves inspecting and replacing worn pinion gears, side gears, and spider gears.
Proper backlash adjustment is critical for smooth operation and longevity; incorrect settings can lead to noise, vibration, and premature wear. Bearing inspection and replacement are also common, as worn bearings contribute significantly to differential problems.
Furthermore, meticulous attention must be paid to the differential’s lubrication system, ensuring adequate fluid levels and the correct type of gear oil. Successful differential repair restores efficient power transfer and handling characteristics.
Troubleshooting Complex Issues
Diagnosing elusive manual transmission problems demands a systematic approach. Begin with a thorough review of reported symptoms – noises, vibrations, or shifting difficulties. Utilize a scan tool to check for any stored diagnostic trouble codes, even if the check engine light isn’t illuminated.
Complex issues often involve internal component failures not easily detected through external inspection. Pressure testing the hydraulic system (if applicable) can reveal leaks or internal wear. Careful analysis of transmission fluid for metal shavings provides crucial clues about gear or bearing damage.
Employing a stethoscope to pinpoint noise origins and performing controlled road tests are vital steps. Don’t overlook seemingly unrelated systems, as issues elsewhere can mimic transmission problems.